
Appearance
Grasshopper
Grasshopper is a powerful computational design tool that uses intuitive visual programming methods. It is embedded in the 3D modelling software Rhinoceros and allows designers and engineers to create parametric models without programming experience.
For initial setup, see the Getting Started page.
Learning resources
A good starting point is the Grasshopper Essential Training. More learning paths are available in the Haskoning Digital Academy.
Rhino license setup
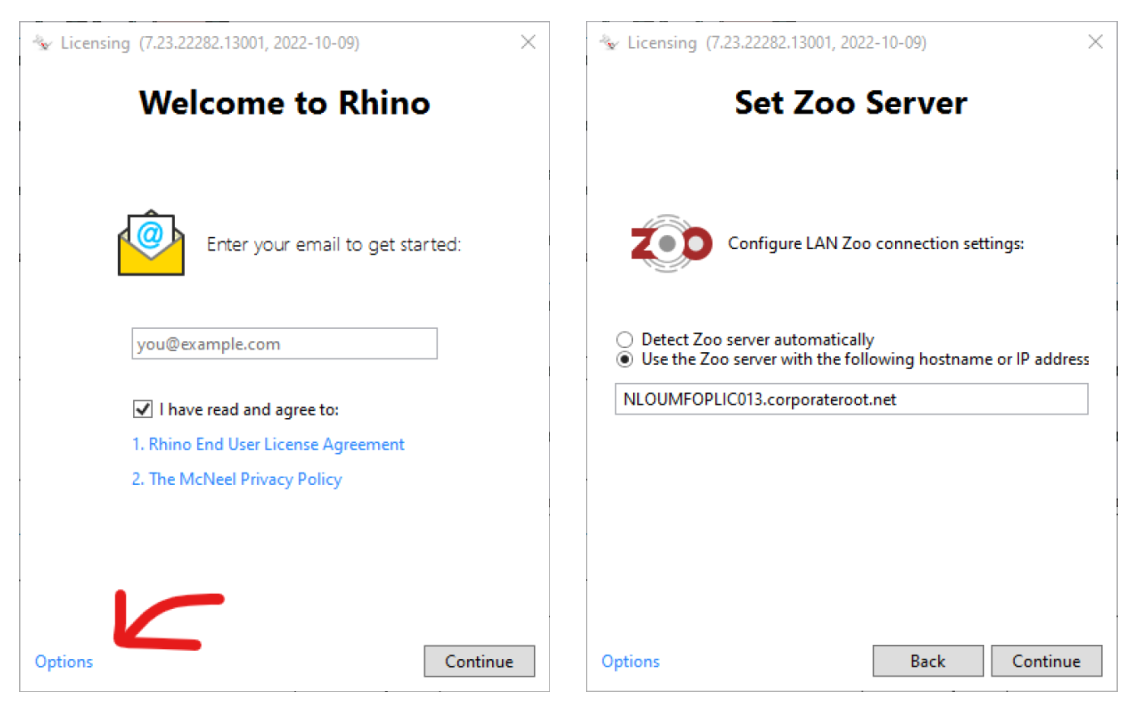
After updating Rhino, it may ask to set the license again:
- Check the box 'I have read and agree to:'
- Click Options and select Use the LAN Zoo
- Select "Use the Zoo server with the following hostname or IP address"
- Fill in:
NLOUMFOPLIC013.corporateroot.net - Click Continue
Recommended plugins
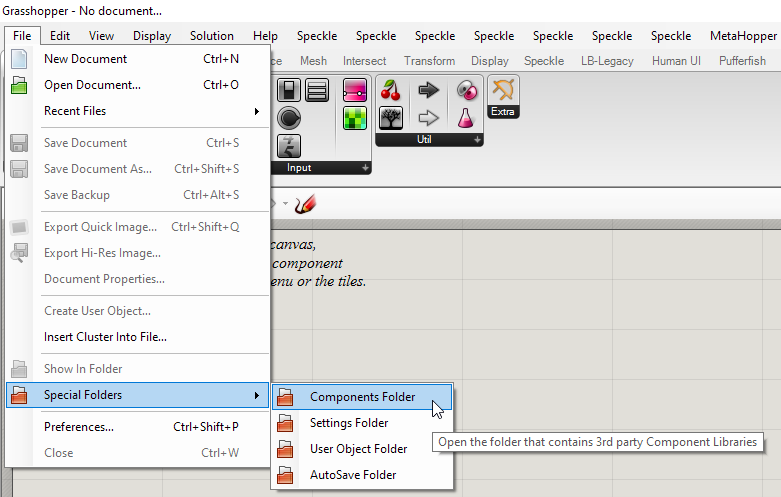
There are all kinds of plugins available for Rhino/Grasshopper. Most of them can be found on Food4Rhino. Installing the plugins can be done by downloading the files and placing them in the Grasshopper Components folder. The folder can be found through File > Special Folders > Components Folder.
Make sure you unblock the files by accessing the properties by right-clicking on the file. 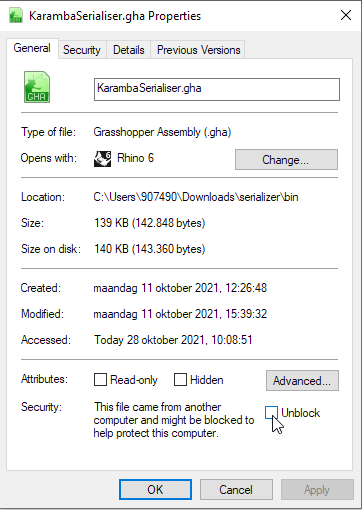
If the files are placed in the folder and unblocked you need to restart Rhino in order to load the newly installed plugins.
Most used plug-ins:
- Metahopper: For manipulating Grasshopper components dynamically. Examples are: 1) Changing wire display, 2) Enable/disable components with a toggle, 3) adding scribbles to groups. With the bottleneck navigator you get insight in which part of your script takes the most time.
- TT toolbox: Contains handy components from Thornton Tomasetti, like: 1) Excel reader / listener, 2) Collibri iterator for retrieving data which you can use for Design Explorer.
- Tree sloth: Data manipulation of branches/trees.
- Human UI: Create a user interface in Rhino with sliders, visualization and outputs of your Grasshopper definition. This is of great value when you present your model to clients.
- LunchBox: Exploring mathematical shapes, paneling, structures, and workflow.
Keep track of your plugins
To be able to transfer your script to others or another computer, you need to keep track of the plugins you use in that script. With a Metahopper component this can be realised.
http://grasshopperdocs.com/components/metahopper/documentInfo.html
Karamba3D
Installation
Install Karamba3D
Get the latest Karamba3D version from their website.
Please note that currently there is no implementation yet available to use load combinations. However, there are workarounds available. Karamba is currently working on implementing load combinations.Copy Rhino Plugin Files
Copy the Karamba_1_x_x_Rhino6Plugin.rhp into the Plugins folder of the Rhino installation on each of the computers which will use the licenses. This is typically C:\Program Files\Rhino 7\Plug-ins.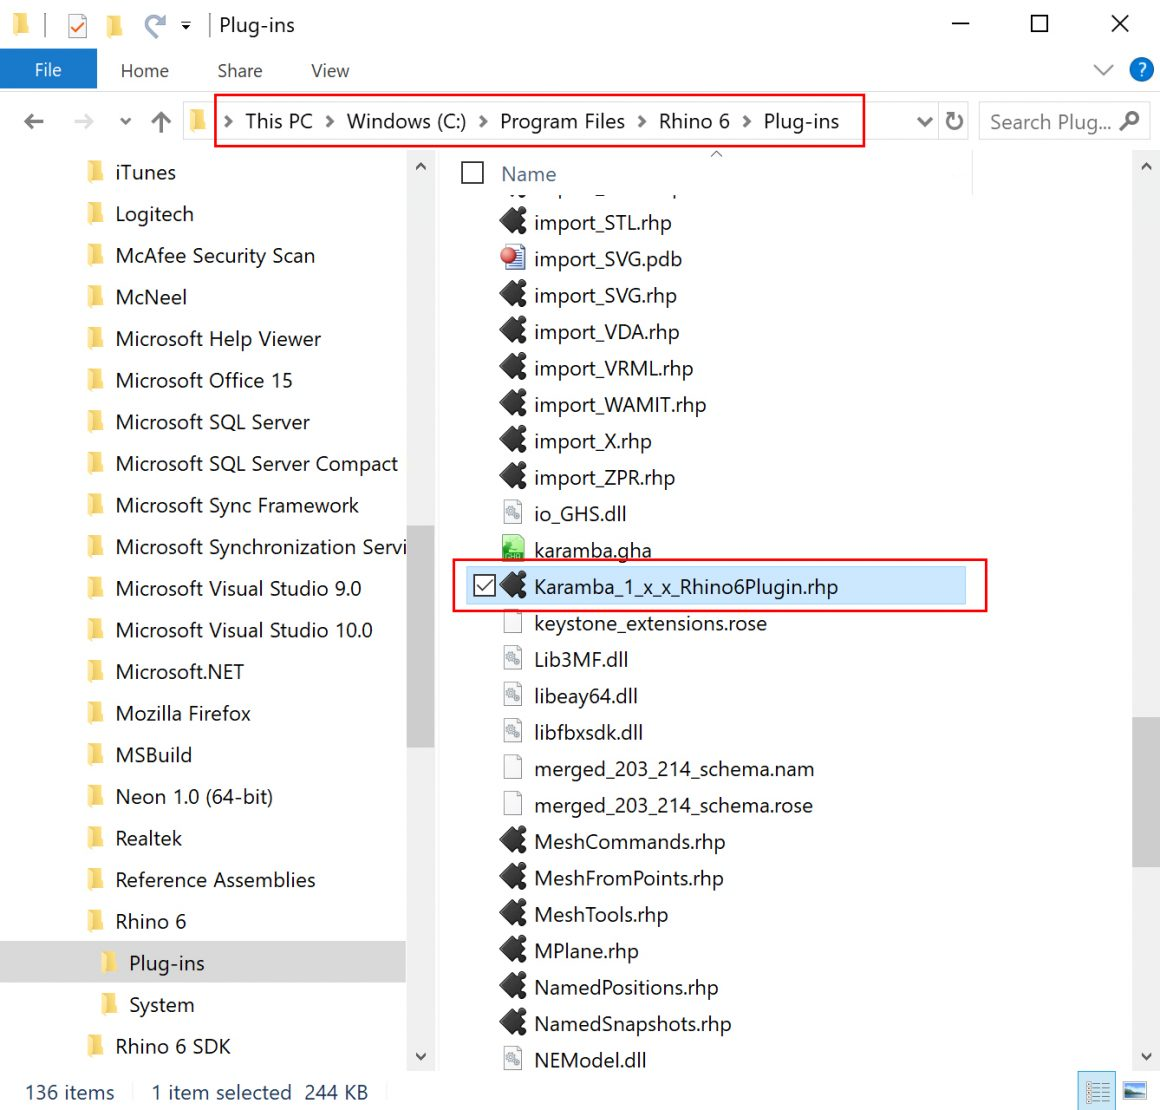
Please note: For admin rights use your employee number and password. Make sure you unblocked the file (see section plugins)
Install Rhino Plugin
Open Rhino and open the Plug-ins Manager in Rhino Options (Tools/Options/Rhino Options/Plug-ins). Click on Install and select the "Karamba_1_x_x_RhinoPlugin.rhp" file in the Plug-ins Folder.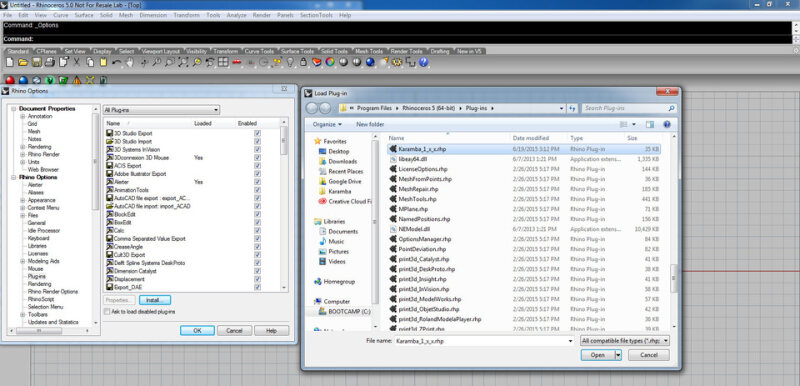
Select network server
A window will pop up to select a license. Select the Use the Zoo option and enter the Zoo server name "NLOUMFOPLIC013.corporateroot.net" in the Use the following Zoo Server box.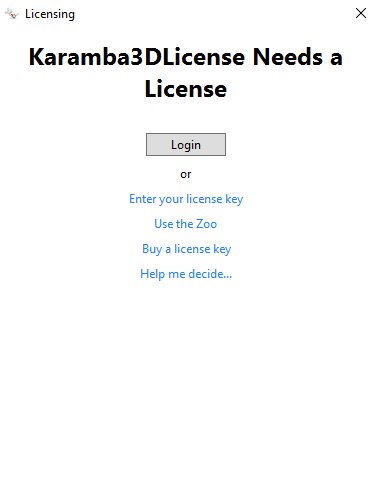
Load License
Close Rhino Options and in the Command Prompt type karamba.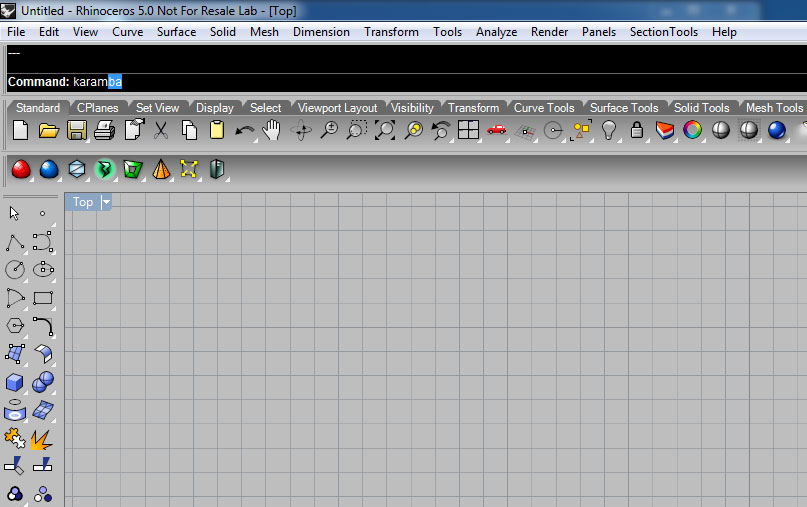
The license will initialize and output the License information. 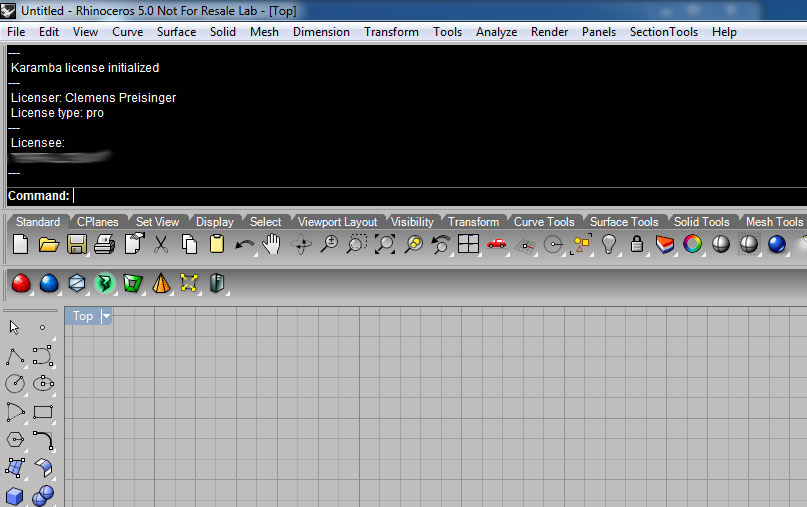
Every time you want to use Karamba3D you have to load the license by typing the karamba command in the Rhino Command Prompt. Licenses are limited so only load a license when you intend to use it. Status of the licenses within our company can be found via http://nloumfoplic013/status.
DataFusr / Karamba3D integration
When you have created a parametric FEM model using Karamba in your Grasshopper script, it is possible to export your model through the Haskoning FEM-client to several connected FEM software packages like SCIA Engineer, STAAD and Sofistik. Using Karamba3D v2.2 (most recent) and higher which can directly connect to our DataFusr FEM-client. Please note that currently there is no implementation yet available to use load combinations. However, there are workarounds available. Karamba is currently working on implementing load combinations.
Further explanation and documentation can be found on the Haskoning FEM documentation website. Any questions can be asked in the Teams channel Community-DataFusr-Users. 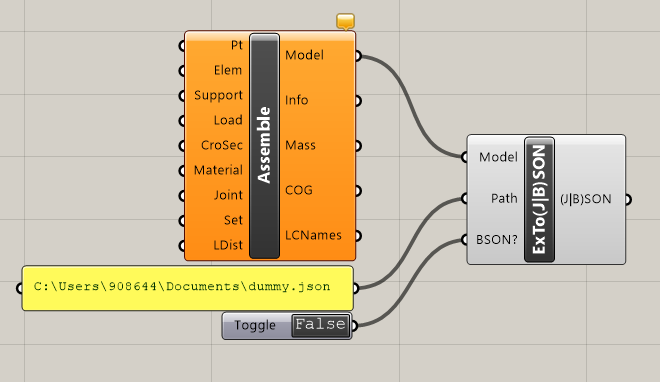
Speckle integration
Speckle will be used in the Parametric Design workflow to exchange data between different software packages and design stages and to create a central data storage and single-source-of-truth for the design development.
Speckle consists of a server, on which the project information is stored in the form of data streams. There is a landing page available via the Speckle web-environment, which allows you to access and view the data and do administration for your streams. The data on the Speckle server is created using the desktop software you're used to work in and streamed to the server using plugins in this software.
Installing Speckle Connectors
To use Speckle with Grasshopper, download the Speckle connectors from the Haskoning Speckle server. Sign in with your Haskoning account to get access. There are numerous tutorials available in the Speckle docs, so we highly encourage you to take a look!
Accessing the Speckle server
The web app can be reached by navigating to https://app.speckle.systems/workspaces/haskoning, which will bring you to the landing page. Speckle consists of a server, on which the project information is stored in the form of data streams. There is one server available for use in projects. The data is organized in projects and projects can have several models. Every update you do to a model in a project is called a version. You can manage accessibility per project. Please have a look in the Speckle Docs to understand the Core Concepts behind this: https://speckle.guide/user/concepts.html.
The Speckle web-environment allows you to access and view the data in the Projects and do the administration. The data on the Speckle server is created using the desktop software you're used to work in and streamed to the server using small plugins in this software. 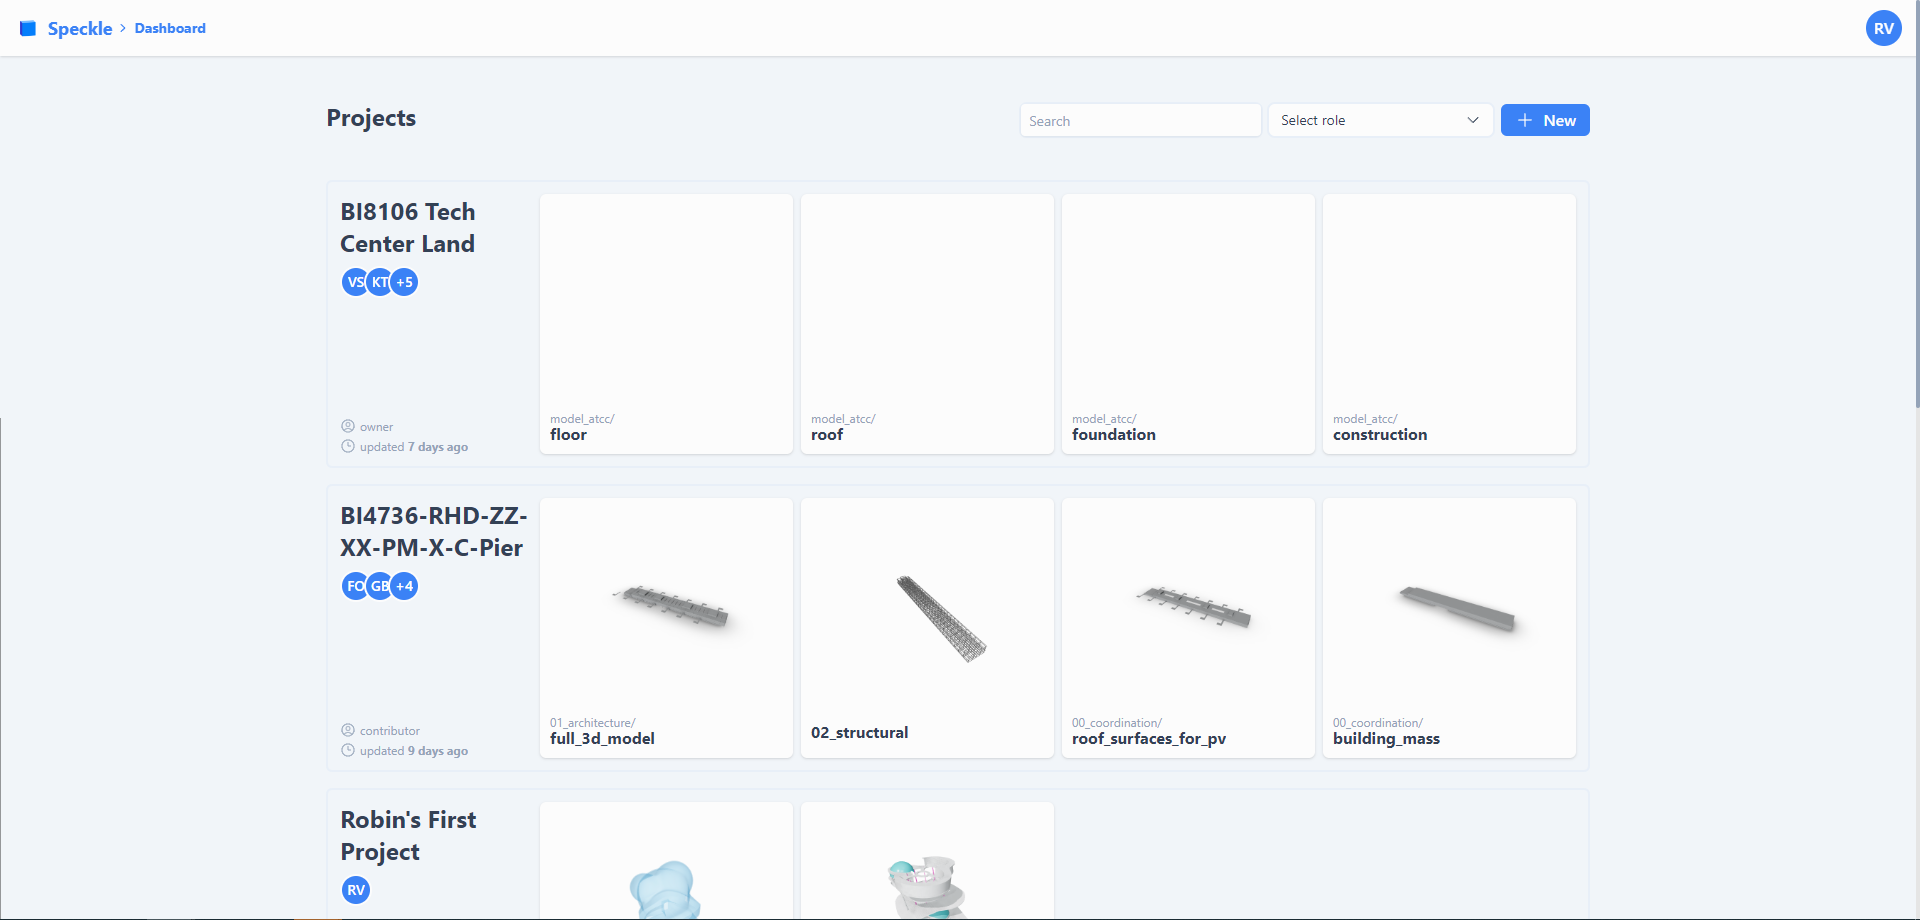
Accessing a project
When clicking on a project, you will navigate to the project homepage. Here you can find an overview of the different models in this project. You can click this to access the 3D viewer. When you click on Manage you can manage access to your project and add colleagues. There is lots of documentation available on all possibilities that the web app provides on the Speckle Docs, so we highly encourage you to have a look at https://speckle.guide/user/web.html! 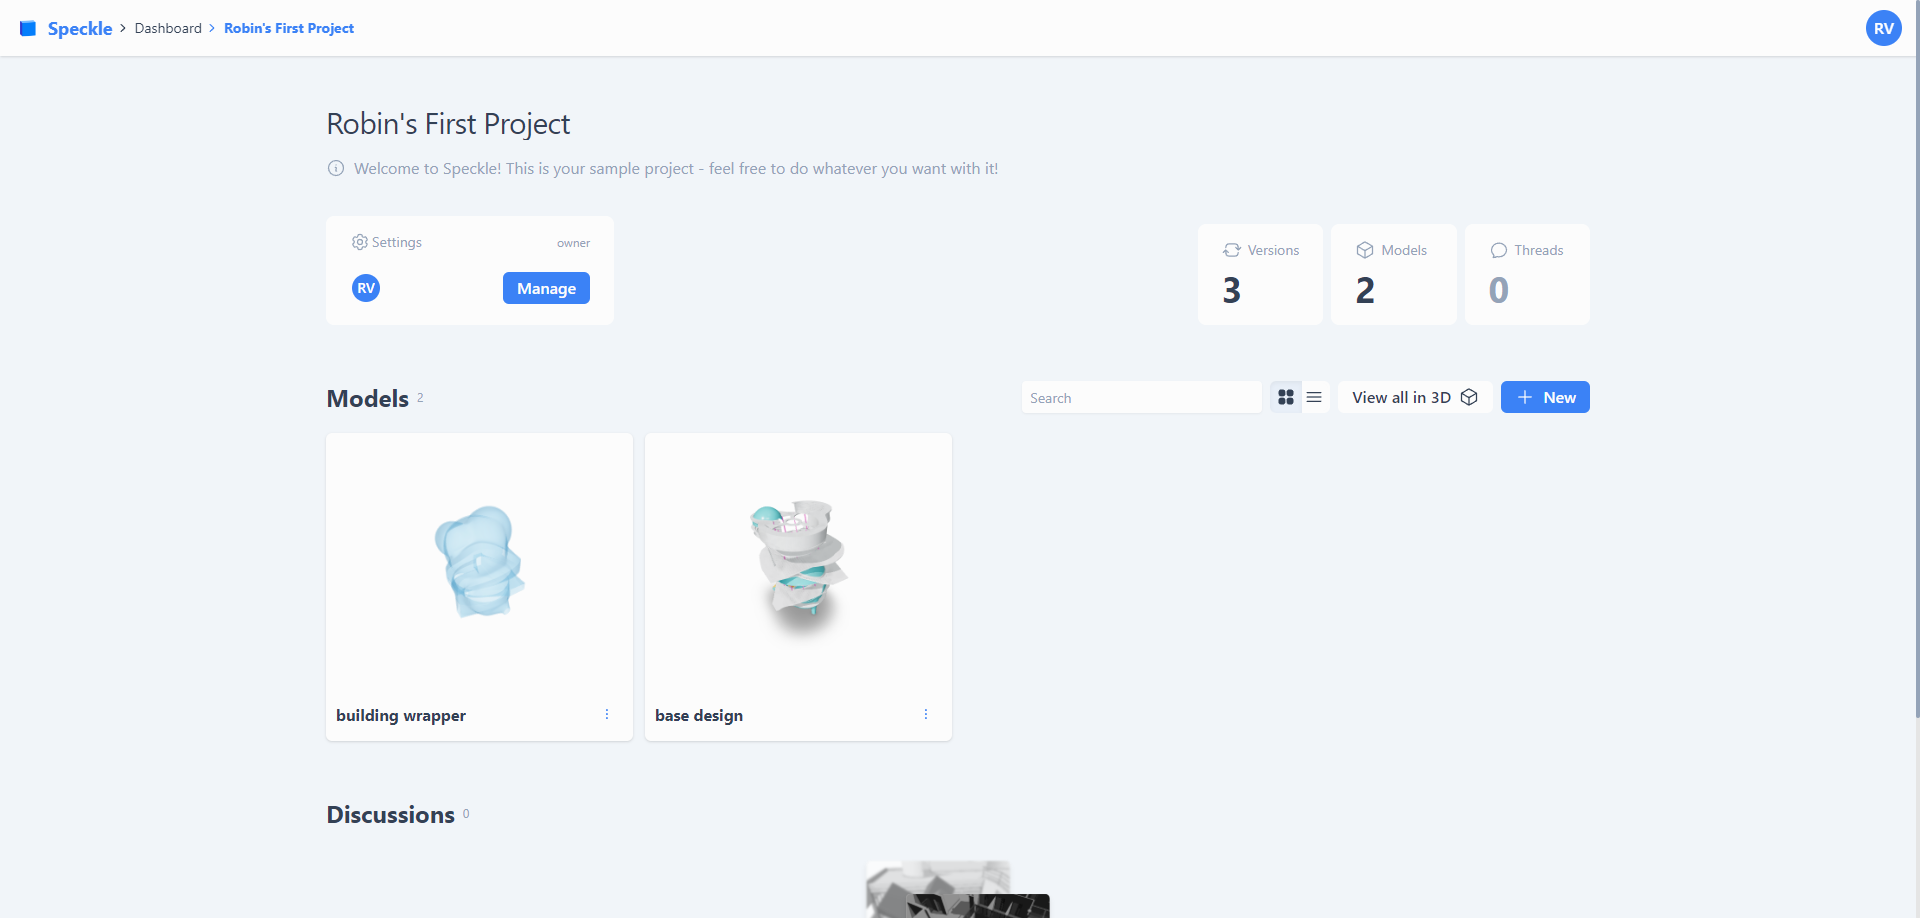
DataFusr Origin
In order to manage your driving parameters centrally you can use DataFusr Origin. This web application enables you to define, modify and export your parameters of your data-driven project. A Grasshopper client can be downloaded to retrieve the data and use it in your parametric model. 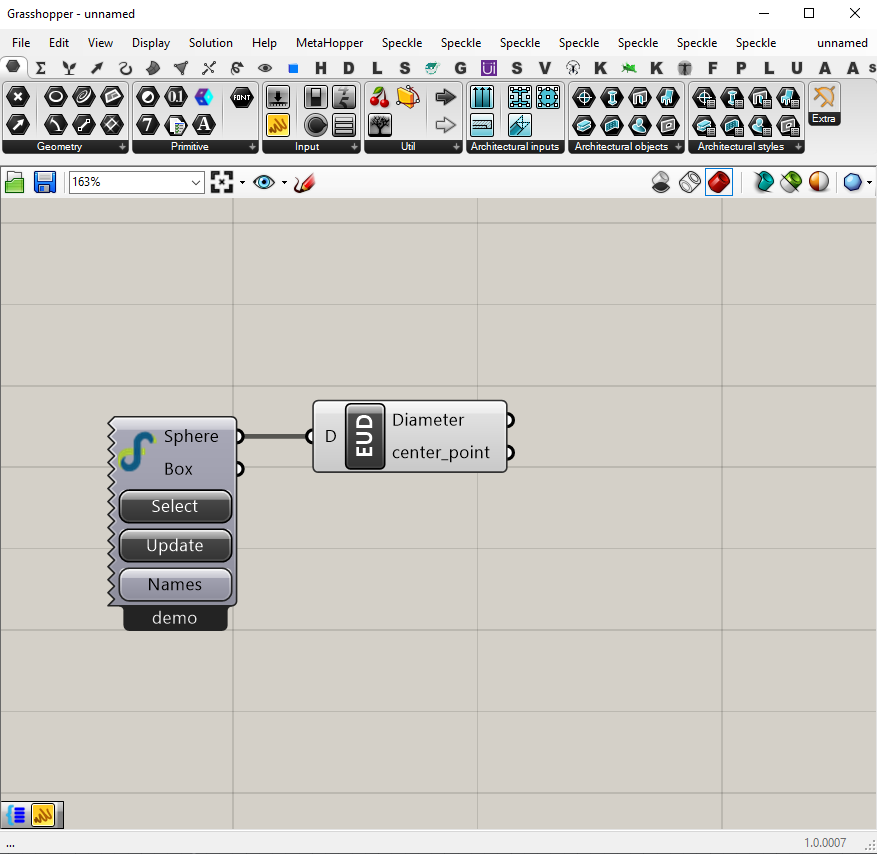
Please make sure you have the latest Rhino version installed in order for DF Origin to function properly
Discipline design tools
Architecture and Building Technology Tools
The DataFusr client for architecture & building technology aims to assist architects and building engineers in their daily work. First and foremost, this client facilitates the connection between the discipline and interoperability platform Speckle. Next to that, some useful tools are developed to use in a computational design context. Most of these tools are available as Grasshopper components, and are part of the Haskoning AB ribbon, which can be downloaded here.
Structural Design Tools
The structural design tools are in the basis a collection of Python code. They implement both formulas from the Eurocode module, as well as some equilibrium calculations that give insight in the design performance of a structure. The tools are distributed as Python code, through an API server and as Grasshopper components.
Automated Engineering tools developed by the ADE-team are found on Structural Design Wiki. All the structural design tools are added to your Haskoning SD ribbon in Grasshopper.
The latest version of the Grasshopper components for Structural Design can be downloaded via the DF Manager. 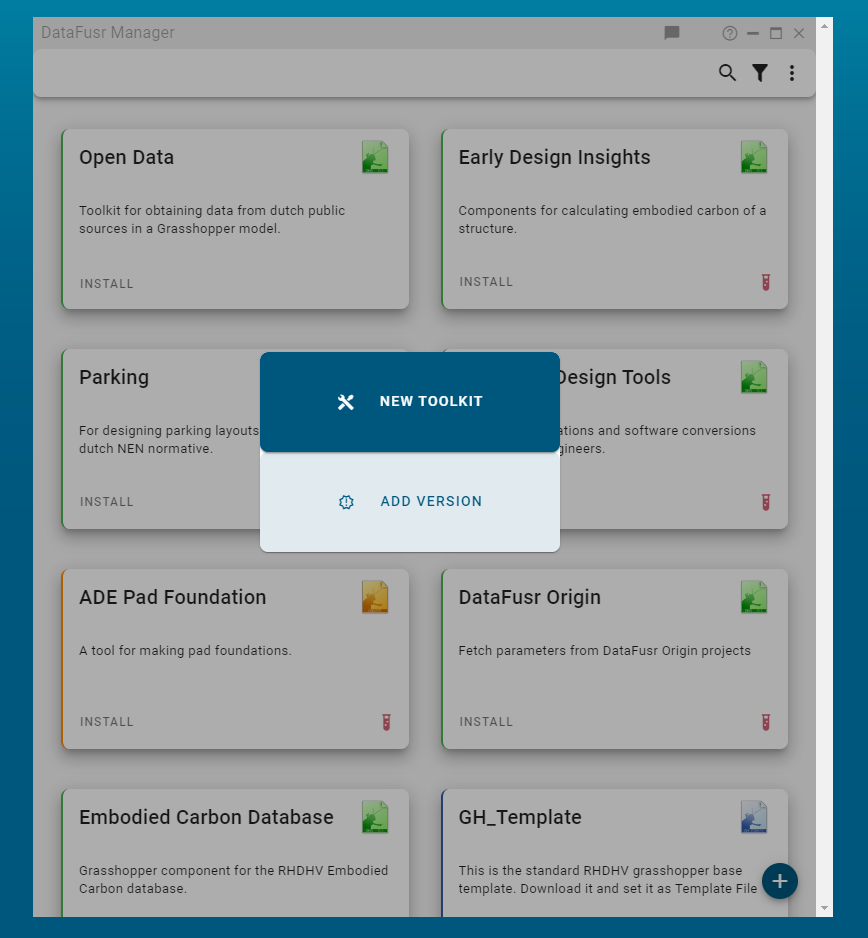
Best practices
Grasshopper settings
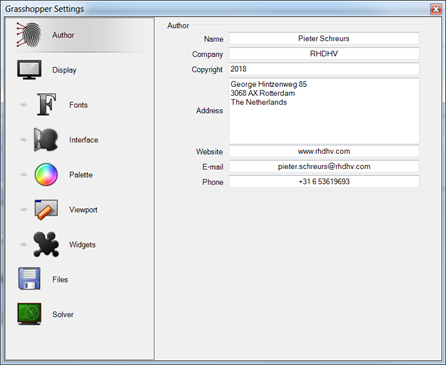
Make sure to always fill in your contact details in your File > Preferences > Author. This way your colleagues can always trace who has created a Grasshopper definition and contact you when they have questions.
Structuring your definitions
Template
Always use the Haskoning Grasshopper template for your definitions. This will help you structure your work and make your Grasshopper definition more readable for your colleagues, or whoever needs to continue with it. You can permanently link to the template file in your File > Preferences > Files, after which the template will be automatically loaded each time you create a new file. 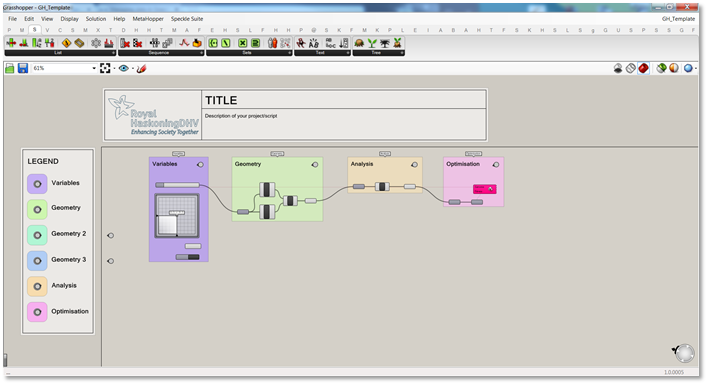
Group variables
Always group your variables on the left-hand side of your script. 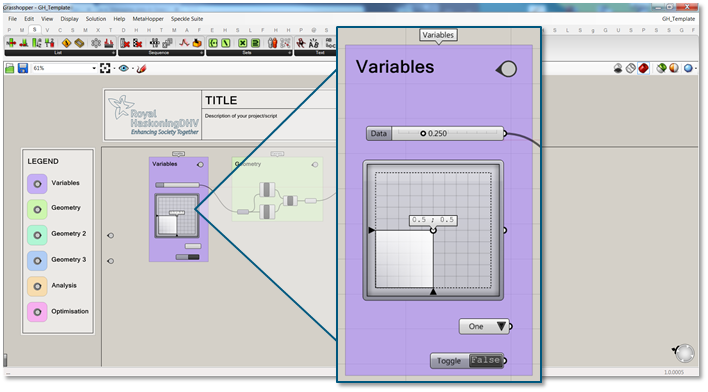
Group functionalities with inputs and outputs
Always group functionalities in your script and use input and output param components at the left and right side of the groups, to make your definition more readable. 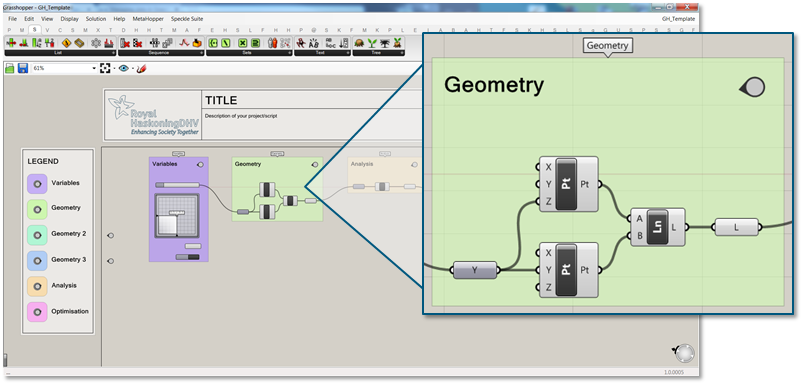
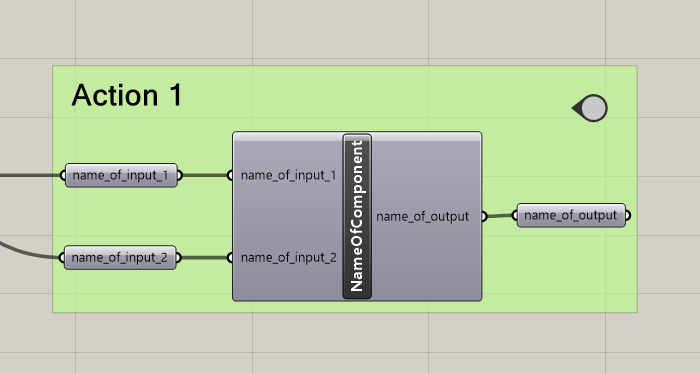
Naming convention
Always use the following naming conventions in your script to make your definition more readable.
- Clusters & Components in CamelCase: "NameOfComponent"
- Input and output params in snake_case: "name_of_input"
Data structures
Make use of data structures to organise your data in your scripts. Have a look at the Grasshopper Cheat Sheet to understand the basics of working with data trees in Grasshopper. 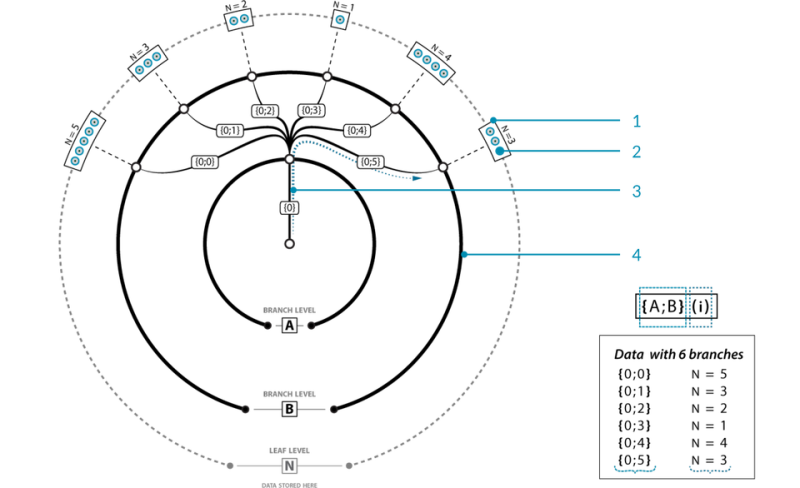
Clusters
When you have a piece of code that you reuse in your script multiple times it's beneficial to create a cluster. Clusters are a way to reuse groups of functions in your script. A big benefit is that when you edit a cluster, the code inside the other linked clusters gets updated as well. A cluster has the same appearance as any other component, but the difference is that you can double-click on it to edit the code inside. Always make sure you make use of descriptive naming and the naming conventions that are mentioned above.
A good tutorial on creating and using clusters can be found on TOI-pedia by TU Delft.
You can also save your cluster as an actual file by right clicking the cluster and click on Export & Reference... Through this way you can link your cluster to multiple Grasshopper models. Editing the cluster in one model and saving your changes will result in an updated cluster in all Grasshopper models that the cluster is placed in. 
User Objects
When you've created a handy piece of Grasshopper definition (either a cluster of components or a custom code block) you can compile them into a user object. (a short tutorial on this). Make sure you use descriptive naming and give clear instructions on how to use the component. Also, please sign your work by setting yourself as the author.
Sharing your work
Grasshopper definitions and workflows
If you have created an awesome definition in Grasshopper, which you think is useful for other colleagues, this is the right place to share it with the Haskoning community.
Please create a new folder for your definition in the Files section of this Teams channel. Please use the following format for your folder name: YYMMDD_{descriptive_name}. In this folder you can upload your Grasshopper definition. It would be great if you can create a short video of your definition in action and shared in the chat section.
Please use the Grasshopper template provided in the Files section of this Teams channel for your definition, don't forget to include a brief description of the functionality, the plugins used in the definition (if any) and your contact details, so people can contact you if they have any questions.
User Objects and Code blocks
When you've created a handy piece of Grasshopper definition (either a cluster of components or a custom code block) you can compile them into a user object. (a short tutorial on this)
Make sure you use descriptive naming and give clear instructions on how to use the component. Also, please sign your work by setting yourself as the author.
Plugins
We have created a Community project in Azure DevOps, that can be used for collectively developing and sharing Grasshopper plugins. A new repository will be created for each plugin and discussions regarding the development can be had in the Developers channel of this forum.
Development of plugins will be done using a Git workflow. Please make sure to clone the repository to your computer and create a specific branch for your own features and developments. Make sure to integrate your developments with the master branch using a pull request, which you can create using the Azure DevOps page.
If you're new to developing plugins, please have a look at this tutorial: https://developer.rhino3d.com/guides/grasshopper/your-first-component-windows/
Sharing of the finalized and compiled plugins will be done in the Files section of this Teams channel. If you just want to use some of the plugins that have been created within Haskoning, please have a look there.